Thursday, June 08, 2017

HopsFS running on top of MySQL Cluster 7.5 wins IEEE Scale Challenge 2017

HopsFS that implements Hadoop HDFS on top of MySQL Cluster 7.5
won the IEEE Scale Challenge 2017.

HopsFS demonstrated a workload that scaled to more than 1 million
file operations per second. HopsFS is an application that uses
our native Java API called ClusterJ to implement Hadoop HDFS.

Friday, April 14, 2017

Setting up MySQL Cluster in the Oracle Bare Metal Cloud

The Oracle Bare Metal Cloud service is an innovative cloud service.
When looking at how it can be used for MySQL Cluster it is a great
fit.

MySQL Cluster is a high availability solution. Oracle Bare Metal Cloud
provides the possibility to have servers that only you use and thus
two Oracle Bare Metal servers are definitely independent of each others
hardware. If you want to also run synchronous replication with no
dependence on network, housing and electricity you can place these
servers in different availability domains in the same region.
Thus it is possible to build individual clusters with very high
availability.

It is still possible to use smaller virtual machines that share the
machine with other simultaneous users.

One of the most important features of MySQL Cluster is predictable
latency. To achieve this it is important that the network latency
is predictable and it is also important that network bandwidth is
constant. Oracle Bare Metal provides this by constructing a
non-oversubscribed network that have round-trip latency below
100 microseconds within an availability domain and below 1 millisecond
round-trip latency between availability domain.

All machines have currently 10 Gbit Ethernet and it has been announced
that this will soon be upgraded to 25Gbit Ethernet. This is great for
MySQL Cluster that is using the network very heavily and relies on it
for predictable latency.

In addition Oracle Bare Metal comes with the option to use servers with
more than a million IOPS that can store 6.4 TByte locally on NVMe drives
even when setup in a RAID10 setup (Oracle BM High IO) with 36 CPU cores
and 512 GByte RAM. So a very capable platform to use MySQL Cluster with
both in-memory data and using the disk data feature in MySQL Cluster and
still have predictable latency.

I have long experience of running benchmarks and even some very large
benchmarks, but all these benchmarks have been done on machines that
have been lacking in IO performance. So for me it is great to see a
platform that have a very capable CPU performance, a large memory
footprint and a very capable IO performance on top of that. So it
will be interesting to run benchmarks on this platform and
continously improve MySQL Cluster performance on this type of
platforms.

In addition it is possible to setup a secure network environment
for MySQL Cluster since each user can set up his own virtual
cloud network that can also be integrated with an on-premise
network.

So I made an exercise today to setup a MySQL Cluster installation on
4 VMs on the Oracle Bare Metal Cloud.

This is the steps that I did to prepare each VM, I will also show how
those steps can easily be automated for a DevOps environment.

The first step is to launch an instance, I used the web interface here
and I used the simplest VM1.1 instances. I decided to launch all instances
in the same availability domain. I will later look into how to setup
things to make it work with more than one availability domain.

I choose to use Oracle Linux 7.3 as the OS for all instances. Each instance
gets a public IP address that can be used to log into the instance with
the user opc. In addition the instances also get a private IP address.
It is possible to also have Public DNS name for each instance, given that
we don't want to use those type of names we don't use any public DNS names
on our instances. I use the 10.0.0.0/16 range of private IP addresses.

Next step is to create a block volume. They come in 256 GByte or 2 TByte sizes
and for this experiment the 256 GByte size was used.

The final step is to attach the block volume to an instance such that each
instance have a block volume.

Next step is to use SSH to log into the machine using
ssh -l opc PUBLIC_IP_ADDRESS
when defining the instance the SSH public key was provided such that this
can be done without password.

Now the block volume needs to be registered, configured to reconnect at
boot and one needs to log into iSCSI. These 3 commands one copies from
the web interface and pastes them in the terminal window.

A final step using the web interface is to enable TCP communication
between the instances in the cloud. To do this one new ingress rule
is added that allows TCP traffic from 10.0.0.0/24 on all ports in a
stateless mode. This means that the network will not block any TCP
traffic between the instances in the cloud. It will still block any
communication to the instances from anywhere outside of my private
cloud network.

To automate those parts one would make use of the REST API available to
interact with the Oracle Bare Metal Cloud service.

After these steps we have now a virtual machine up and running, we have
a device (gets named /dev/sdb). So now it is time to install MySQL Cluster
software, create a file system on the device and setup networking and
finally setup the firewall for the instances.

At first we want to setup the file system for each instance. My personal
experience is that I prefer using XFS as file system for MySQL Cluster.
It works with all sorts of other file systems, but XFS is good at high
write loads that are common when using MySQL Cluster.

Next we mount the new file system on the directory /ndb_data.

In Oracle Linux 7.3 the firewall is setup to block most traffic by default.
So in order to make it possible to communicate on the appropriate ports
we open up the ports 1186 (NDB Management server port), 3306 (MySQL Server
port), 11860 (MySQL Cluster data node port), 33060 (MySQLX port).

This is performed by the command
sudo firewall-cmd --zone=public --permanent --add-port=1186/tcp
for all ports followed by
sudo firewall-cmd --reload
to ensure that the new firewall rules are used.

To prepare the MySQL repo to use MySQL Cluster we have copied over
the mysql57-community-release-el7-10.noarch.rpm file that gives
access to the MySQL repos.

So we issue the command to install this into Oracle Linux.
Next we install yum-utils to be able to use yum-config-manager
rather than editing yum files to disable MySQL 5.7 and enable
MySQL Cluster 7.5 repo.

Now I put all of this into a script that in my case looks like this.

#!/bin/bash
sudo firewall-cmd --zone=public --permanent --add-port=1186/tcp
sudo firewall-cmd --zone=public --permanent --add-port=3306/tcp
sudo firewall-cmd --zone=public --permanent --add-port=11860/tcp
sudo firewall-cmd --zone=public --permanent --add-port=33060/tcp
sudo firewall-cmd --reload
sudo mkfs.xfs -d su=32k,sw=6 /dev/sdb
sudo mkdir /ndb_data
sudo mount /dev/sdb /ndb_data
sudo chown opc /ndb_data
sudo chgrp opc /ndb_data
sudo rpm -ivh mysql57-community-release-el7-10.noarch.rpm
sudo yum install -y yum-utils
sudo yum-config-manager --disable mysql57-community
sudo yum-config-manager --enable mysql-cluster-7.5-community

Now the script to prepare the data node VMs also add the line:
sudo yum install -y mysql-cluster-community-data-node

The script to prepare the NDB management server VM adds the line:
sudo yum install -y mysql-cluster-community-management-server

As usual the installation of the MySQL Server VM is a bit more
involved. Oracle Linux 7.3 comes with MySQL 5.6 preinstalled and
also postfix dependent on the MySQL Server. In addition we depend
on the EPEL (Extra Packages for Enterprise Linux) being accessible.

So the script here needs to add the following lines:
sudo rpm -ivh http://dl.fedoraproject.org/pub/epel/7/x86_64/e/epel-release-7-9.noarch.rpm
sudo yum remove -y mysql-community-{server,client,common,libs}
sudo yum install -y mysql-cluster-community-{server,client,common,libs}

This means that postfix is no longer installed, but this should be
ok since it is a very specialised VM we have prepared.

Now we write the config.ini file for this cluster. We use serverport equal
to 11860 to ensure that all communication to the data node goes through the
same port that we have opened in the firewall.

We create 4 mysqld instances to give the possibility to run a few tools in
parallel to the MySQL Server.

One block volume have a maximum throughput of 1500 IOPS (4kByte IO),
so we configure MinDiskWriteSpeed and MaxDiskWriteSpeed parameters to ensure
that we don't oversubscribe the resources to the disk for checkpointing.
If more bandwidth is needed one should add more block volumes. Also 2 TByte
volumes have higher bandwidth.

Even the smallest VM in the Oracle Cloud have 7GByte of memory so we set up
the instance with 4GByte of data memory and 500M of index memory.

[ndb_mgmd]
nodeid=49
hostname=10.0.0.4
datadir=/ndb_data

[ndbd default]
noofreplicas=2
serverport=11860
datadir=/ndb_data
MinDiskWriteSpeed=2M
MaxDiskwriteSpeed=5M
MaxDiskwriteSpeedOtherNodeRestart=5M
MaxDiskWriteSpeedOwnRestart=5M
DataMemory=4G
IndexMemory=500M

[ndbd]
nodeid=1
hostname=10.0.0.5

[ndbd]
nodeid=2
hostname=10.0.0.6

[mysqld]
nodeid=53
[mysqld]
nodeid=54
[mysqld]
nodeid=55
[mysqld]
nodeid=56

Finally we also need a configuration file for the MySQL Server.

[mysqld]
ndbcluster
datadir=/ndb_data/data
socket=/ndb_data/mysql.sock
log-error=/ndb_data/error.log
pid-file=/ndb_data/mysqld.pid

We store the configuration file for the cluster in the NDB management
server VM in /ndb_data/config.ini. We store the MySQL Server configuration
file in the MySQL Server VM in /ndb_data/my.cnf.

Obviously for a real-world use case more care has to be put into setting
up the configuration, but this will be sufficient for a reasonable demo
case.

Now it is time to start things up.
First we start the management server in the NDB management server VM:
ndb_mgmd -f /ndb_data/config.ini --initial
--configdir=/ndb_data --ndb-nodeid=49

Next we start the data nodes in the data node VMs. We use ndbd here since
it is the most efficient use case in a very small VM, when going beyond
2 CPUs one should use ndbtmd instead.

ndbd --ndb-connectstring=10.0.0.4 --ndb-nodeid=1
and
ndbd --ndb-connectstring=10.0.0.4 --ndb-nodeid=2

Finally we can monitor that the cluster have started using
ndb_mgm --ndb-connectstring=10.0.0.4
and issue the command show and quit to exit the NDB management client.

Now we bootstrap the MySQL Server with
mysqld --defaults-file=/ndb_data/my.cnf --initialize-insecure
and next we start the MySQL Server:
mysqld --defaults-file=/ndb_data/my.cnf --ndb-connectstring=10.0.0.4

and we're done.

We can now connect to the MySQL Server from the client with
mysql --socket=/ndb_data/mysql.sock --user=root

and start doing whatever database commands we want to test.

Later I will look at a bit more advanced tests of MySQL Cluster in the
Oracle cloud and execute some benchmarks to see how it works.

Thursday, April 13, 2017

Setting up a MySQL Cluster in the Cloud

In my previous post I covered how to install MySQL Cluster on
a Red Hat VM.

In order to run MySQL Cluster in a cloud environment I use 4 VMs.
This is sufficient for a demo or proof of concept of MySQL Cluster.
For a production environment it is likely that one would want at least
6 VMs. It is generally a good idea to use one VM per process.
This has the advantage that one can perform an upgrade in the
order suitable for upgrading MySQL Cluster.

I used one VM to handle the NDB management server. When this
node is down no new nodes can join the cluster, but living nodes
will continue to operate as normal. So in a demo environment it
is quite sufficient to use 1 NDB management server. In a production
environment it is quite likely that one wants at least two
management server VMs.

I used two VMs for data nodes. This is the minimal setup for a
highly available MySQL Cluster. Since MySQL Cluster is designed
for high availability it makes sense to use a replicated setup even in
a demo environment.

I used one VM for the MySQL Server and for MySQL client and
NDB management client. This is good enough for a demo, but in
a production environment it is likely that one wants at least two
MySQL Server VMs for failover handling but also for load
balancing and normally probably even more than two VMs for
MySQL Servers.

The first step is to create these small 4 instances. This is very straightforward
and I used the Red Hat 7.3 Linux OS.

Each instance comes with 3 IP addresses. One IP address is a global
IP address used to SSH into the instance. Next there is Public
hostname of the machine and finally there is a private IP address.

The Public IP address is used to connect with SSH, it isn't intended for
communication between the VMs inside the cloud. It is possible to use
the Public hostnames for this, it is however better to use the private IP
addresses for communication inside the cluster. The reason is that otherwise
the cluster also depends on a DNS service for its availability.

I will call PrivIP_MGM the private IP address of the NDB management
server VM, PrivIP_DN1 the private IP address of the first NDB data node
and PrivIP_DN2 of the second data node and PrivIP_Server.

Each instance you log in as the user ec2-user, so I simply created a directory
called ndb under /home/ec2-user as the data directory on all VMs.

So the first step towards setting up the cluster is to create a configuration
file for the cluster called config.ini and place this in
/home/ec2-user/ndb/config.ini on the NDB management server VM.

Here is the content of this file:
[ndb_mgmd]
nodeid = 49
hostname=PrivIP_MGM
datadir=/home/ec2-user/ndb

[ndbd default]
NoOfReplicas=2
ServerPort=11860
datadir=/home/ec2-user/ndb

[ndbd]
nodeid=1
hostname=PrivIP_DN1

[ndbd]
nodeid=2
hostname=PrivIP_DN2

[mysqld]
nodeid=53
[mysqld]
nodeid=54
[mysqld]
nodeid=55

We set ServerPort to 11860 to ensure that we always use the same port number
to connect to the NDB data nodes. Otherwise it is hard to setup a
secure environment with firewalls.

A good rule for node ids is to use 1 through 48 for data nodes, 49 through
52 for NDB management servers and 53 to 255 for API nodes and MySQL
Servers. This will work in almost all cases.

In addition we need to create a configuration file for the MySQL Server.
In this file we have the following content:

[mysqld]
ndbcluster
datadir=/home/ec2-user/ndb/data
socket=/home/ec2-user/ndb/mysql.sock
log-error=/home/ec2-user/ndb/mysqld.log
pid-file=/home/ec2-user/ndb/mysqld.pid
port=3316

We provide a socket file, a log file, a pid file and a data directory
to house the data of the MySQL Server under the ndb data directory.

The reason I use port 3316 is that I wanted to avoid any problems
with other MySQL Server installations. Oftentimes there is already
a MySQL Server installed for various purposes on a machine. So
I decided to make it easy and use port 3316, this is absolutely not
a necessity, more out of laziness on my part.

Now before we move on to start the cluster there is an important
part missing before we are ready to go.

The Linux instances are not going to be able to communicate with
each other unless we set them up for that.

To set up Linux instances to communicate with each other one
uses a concept called Security Group. I created a special security
group I called NDB Cluster that opened up the following ports
for TCP traffic. 1186 (NDB Management Server port), 3306
(MySQL Server port), 3316 (extra MySQL Server port),
8081 (MySQL Cluster Auto-Installer port), 11860
(MySQL Cluster Data node port) and 33060 (MySQLX port).
It is important to open up all those ports for both inbound traffic
as well as outbound traffic.

Now we are ready to start things up.

First we start the NDB management server in its VM
using the command:
ndb_mgmd -f /home/ec2-user/ndb/config.ini --initial
--configdir=/home/ec2-user/ndb
--ndb-nodeid=49

Next I started the two data nodes in their VMs using the command:
ndbd --ndb-connecstring=PrivIP_MGM --ndb-nodeid=1
and
ndbd --ndb-connectstring=PrivIP_MGM --ndb-nodeid=2

Now after a short time we have a working cluster.

So next step is to start up the MySQL Server.
This is done in two steps. The first step is a bootstrap step to
create the MySQL data directory and create the first user.
This is just a demo so we will use the simple insecure
method. In a production environment one should use a
proper initialisation that sets passwords.

The first command is:
mysqld --defaults-file=/home/ec2-user/ndb/my.cnf --initialize-insecure

This command will bootstrap the server. Next we start the MySQL Server
using the command:

mysqld --defaults-file=/home/ec2-user/ndb/my.cnf --ndb-connectstring=PrivIP_MGM

Now we have a setup that is working with a management server, two data nodes
and a MySQL Server up and running. So now one can connect a MySQL client
to the MySQL Server and perform more experiments or some other MySQL
application. Obviously to use some more realistic application it is likely that
a configuration with more memory, more disk space and more CPU resources
is needed.

Installing MySQL Cluster 7.5.6 on Red Hat derivatives

MySQL Cluster 7.5.6 comes with a new nice feature. It is now possible
to install MySQL Cluster using the MySQL repos. I made an exercise today
in setting up a cluster today in the cloud using these new
MySQL repos. This blog describes the work to install MySQL Cluster
on the VMs.

I set up the cluster using 4 different VMs. I used the standard free
t1.micro instances, the aim was to test an installation, not to actually
make anything useful work. For that one would most likely want a bit
fatter VMs. I used Red Hat 7.3 as the OS for the VMs.

So after creating the 4 VMs I ssh:ed into each one. The first step
needed is to ensure that the Linux instance knows about the MySQL repos.
I went to http://dev.mysql.com/downloads/repo/yum to download the
small RPM needed for this. This file is called
mysql57-community-release-el7-10.noarch.rpm. After downloading
this to my machine I used scp to copy the file over to each of the 4
VMs.

Next I ran the command
sudo rpm -ivh mysql57-community-release-el7-10.noarch.rpm
in each VM.

Now by default this activates packages from MySQL 5.7. It does
however also have packages available for MySQL 5.5, 5.6, 8.0 and
also MySQL Cluster 7.5. In order to use the correct version it is
necessary to edit the file
/etc/yum.repos.d/mysql-community.repo

There is a section in this file for MySQL 5.7 called
mysql57-community, this section contains a variable called
enabled that one should change from 1 to 0. Similarly the
section mysql-cluster-7.5-community has a variable enabled
that one should change from 0 to 1.

Now save the file and the MySQL repo is ready to start
installations of MySQL Cluster binaries. It needs to be edited
on all VMs using sudo and an editor of choice (vi for me).

I installed one VM as NDB management server and 2 VMs as
NDB Data Node VMs. The fourth VM I installed the MySQL Server
and client packages into.

Installing in the VM for the NDB management server is now easy.
The command is:
yum install mysql-cluster-community-management-server

Installing in the VMs for the NDB data nodes is also very easy.
The command is
yum install mysql-cluster-community-data-node

Installing the MySQL Server version is a bit more involved since
the MySQL Cluster server package depends on some Perl
part not part of a standard Red Hat installation.

So on the VM used for MySQL Server we first need to install
support for installing EPEL packages (Extra Packages for
Enterprise Linux). This is performed through the command:
rpm -ivh http://dl.fedoraproject.org/pub/epel/7/x86_64/e/epel-release-7-9.noarch.rpm

After installing this it is straightforward to also install the MySQL
Server package. This package will also download the MySQL client
package that also contains the NDB management client package.
The command is:
yum install mysql-cluster-community-server

Wednesday, January 18, 2017

MySQL Cluster up and running in less than 4 minutes

This blog is full of graphics.
A while ago I decided to try out the MySQL Cluster Auto Installer.
I have my own scripts and tools to work with MySQL Cluster so
I don't normally need to use it. But I wanted to know what it could
do and could not do. So I decided to take it for a spin.

I was actually positively surprised. It was very quick to get up and running.
Naturally as with any graphics tool it will get you to a point, if it meets issues
it can be hard to discover the issues. But there are ways to debug it as well
and naturally you have access to all MySQL log files as well as all the
NDB log files.

My personal takeaway is that the MySQL Cluster Auto Installer is a very good
tool for developing applications towards MySQL Cluster. For a production
installation I would probably want a bit more control over things and would
most likely write up some scripts for it. Also in a DevOps environment there
are other tools that can come in handy. But for a developer that wants to
develop an NDB API application or a MySQL application or any other
type of application in MySQL Cluster it seems a very good tool to get
MySQL Cluster up and running and shutting it down when ready for the
day.

We are working on some improvements of the Auto Installer, so if you have
opinions or bug reports referring to the Auto Installer please let us know
your preferences.

When I tried things out I used MySQL Cluster 7.5.4 and it worked flawlessly
on Mac OS X. On Windows there was some issues with my Windows installation
using Swedish and Windows uses the cp1252 character set which isn't compatible
with UTF-8. So I had to fix some conversion of some messages from Windows.
This bug fix is available in MySQL Cluster 7.5.5 that was recently launched.

The nice thing with a Python program was that to fix the bug one could simply edit
the script and run it again.

In this blog I will show you each step needed to get to a running MySQL Cluster
installation. I was personally able to perform the entire installation, definition of
the cluster, deploying the cluster and starting the cluster and waiting for this to
complete in 3 minutes and 50 seconds. Most likely for a newbie it will take a bit
longer, but with this blog as aid it should hopefully proceed very quickly.

This blog shows how to do this on my development machine which is running
Mac OS X. I also tested it on Windows and the steps are almost the same although
the Windows installer looks a bit different to the Mac OS X installer.

It should similarly be similarly easy to do this on Linux and Solaris.

My personal next step is to try out how it works to do a similar thing with
multiple machines. I have some Intel NUCs and some laptop running Linux that
should be possible to control from the Auto Installer in a similar fashion.

Developing a MySQL Cluster application definitely benefits from having a few
small servers in the background and Intel NUCs are a nice and cheap variant of
this that comes in at a very reasonable price.

After that I will also test the same thing but using some virtual machines in
the Cloud.

Description of the cluster you get up and running

After completing the below steps you will have MySQL Cluster up and running.
This will give you 2 MySQL Servers to access. Both of those MySQL Servers
can be used to both read and write all data. If you create a table in one MySQL
Server it will be present also in the other MySQL Server.

Some things such as views, triggers and functions are still per MySQL Server,
so you need to define them on each server.

So it is very easy to load balance your application towards those MySQL Servers
since they are all equal. The same would be true even if you had 100 MySQL
Servers. The actual data is stored in the data nodes but most of the processing
is done in the MySQL Servers.

You can also use the same setup to execute NDB API applications using a
low-level interface to MySQL Cluster that will in many cases have 10x
better performance but obviously also a higher development cost.

Another nice tool to develop applications with high performance using
the NDB API more directly is using ClusterJ which is a native Java
API towards MySQL Cluster. This interface is very easy to use
and uses an object-relational mapping.

Description of the steps

To download MySQL Cluster the easiest way is actually in my opinion to google it.
So MySQL Cluster Download in a google window will get you to the MySQL Cluster
download page quickly.


I am running this demonstration on a Mac OS X computer, so the download page
will automatically send me to the download page for MySQL Cluster on Mac OS X
 I personally prefer the Mac installer image (.dmg file). The download of this will take
some time since it is about 400 MBytes. I am based in Sweden where 100 Mbit per
second download speeds are normal, so for me this takes about 1 minute.


After clicking Download I also need to click on one more page to get the download started.


While waiting for the download to complete I get a progress bar on the download on Mac OS X.


Once the download I open up the Downloads and click on the most recent download.
This will start up the installation process. The window below then pops up and I double
click on the package symbol.


Next I get a message about what I am doing with some references to further information.
I simply click Continue here.


Next the GPL license is presented to me, I click Continue.


I have to click Agree on that I agree to the usage terms described in the
GPL license.


Next before the actual installation starts I will be presented with the fact that this
will consume 1.6 GByte of my disk space. I click Install to start the Install.


On Mac OS X any new software install requires administrative privileges. So I get a
login window where I have enter my password to authenticate that I really want this
software installed. After typing the password I click Install Software.


After a short time the install is complete and I can click Close to finish the
installation.


Now we have managed to install MySQL Cluster. The next step is now to
start up the MySQL Cluster Auto Installer. This is a bit more involved but still
not that difficult. On Windows this can be started with a simple double-click
on the setup.bat file in the bin directory. On Mac OS X you need to start up
a terminal window to start the Web Server that drives the Auto Installer.

To start a terminal you go into the Launchpad and click on the symbol below.


Then click on the Terminal symbol and a terminal window will appear.


In the terminal window you change the directory to the bin directory of the
MySQL Cluster installation as can be seen in the window below. In this
directory you execute the Python program ndb_setup.py.

This Python Program starts a web server on the port 8081, if this port is already
used it will attempt with 8082, 8083 and so forth up until 8100 before it gives up.

Immediately after this web server has started it will launch a window in your
default browser.


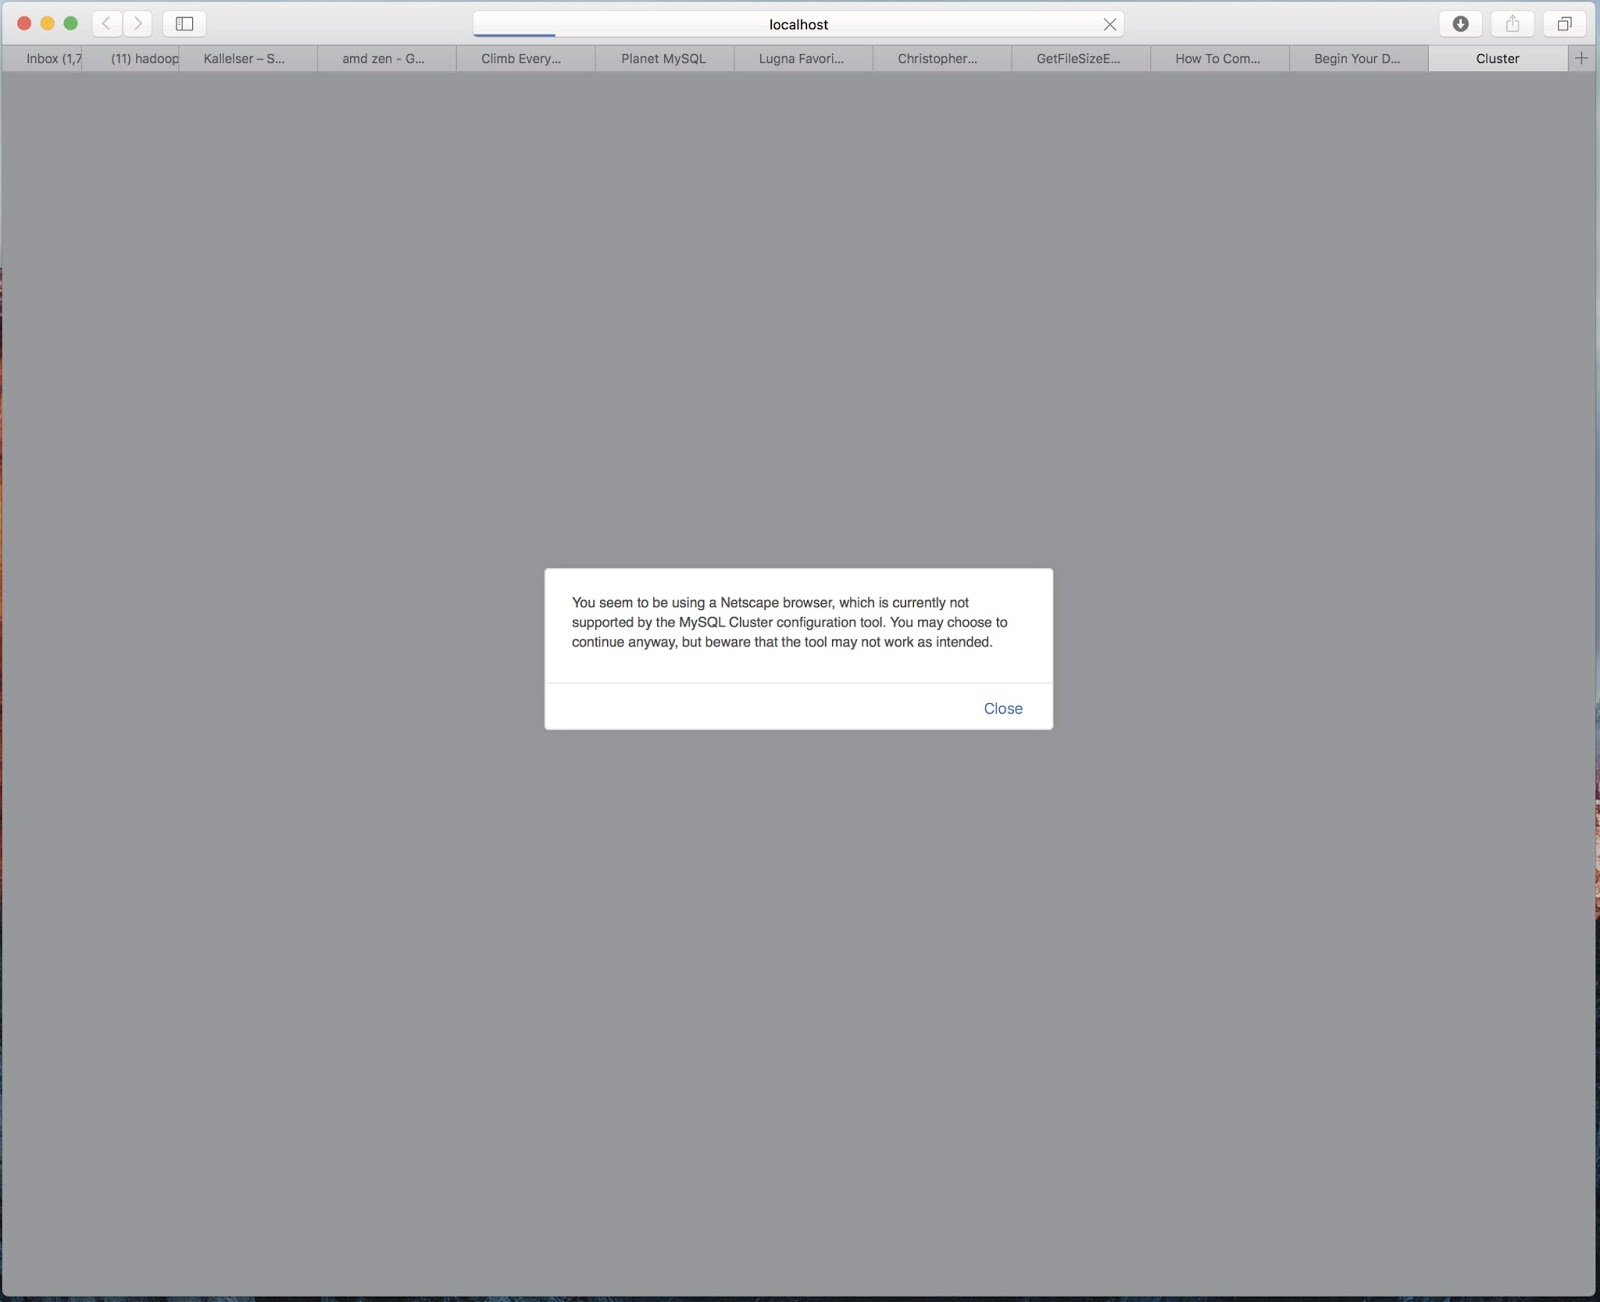
In my case this is a Safari browser. I get a warning message that this isn't the
most well tested browser, however I have had no issues with using the
Safari browser so simply click Close here.


Now I get to the starting window of the MySQL Cluster Auto Installer.
I am doing my first installation so I will click on Create New Cluster.


I now get to the Define Cluster page. I define the hosts to use. Here I will
only run the tests on localhost, so only one host 127.0.0.1 is used.
I will use the simple testing variant that will use a part of my memory but not all.
If I run this on Windows I should also click away the use of SSH unless I want to
follow the instructions on how to use SSH on Windows. This is documented in the
MySQL Cluster Auto Installer manual.

When I am finished on the page I click Next.


Now the next page is pretty cool. The Web server has discovered where I have my
installation, it has found out which OS I am using, it has knowledge of how much
memory I have, it knows how many CPU cores I have and it proposes an installation
directory that I in this case will accept.

When I run this command on my Windows box I usually move the installation
directory to the D: disk instead of the C: since the C: disk is pretty full on my
Windows box.


Now we get to define the processes. The default in this case is one management server,
2 data nodes, 2 MySQL Servers and 3 API node slots (can be used to execute various
NDB tools or NDB API applications).

I see no specific reason to change so I click Next immediately.


Next I come to a page where I can edit the configuration before launching the start
of the cluster. On each node I can define Node Id, Data directory and Hostname if
I want to change those from the default.


If I click Show advanced configuration options and then click on Data layer I get
a chance to edit the MySQL Cluster configuration file. Here I can edit a multitude
of configuration parameters for MySQL Cluster although not all of them.


After I have finalised setting up the configuration I click Next. This brings
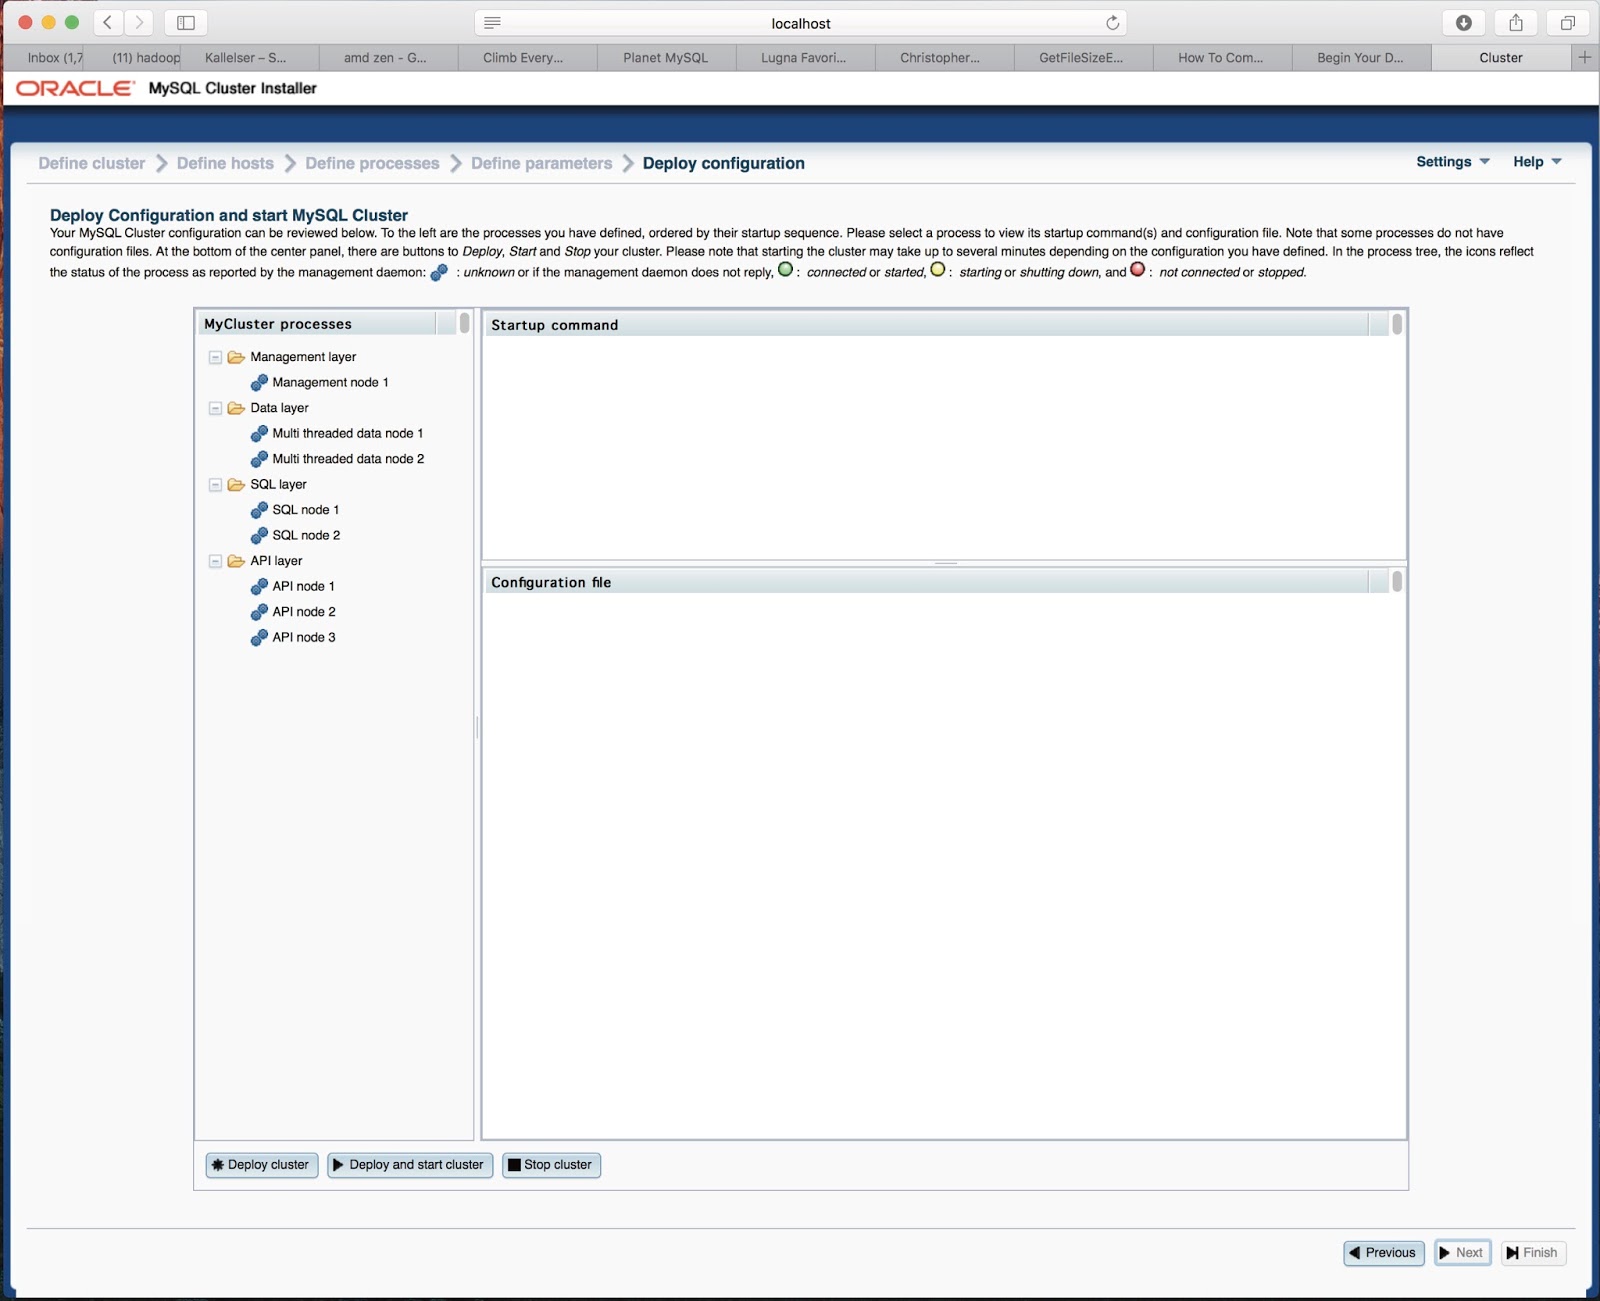
me to the Deploy and Start page.

I start by Deploying the cluster to get a chance to manually edit the configuration
files as well. If I don't care to edit those I can click Deploy and start cluster
which will also start the cluster immediately after deploying.

I only clicked Deploy cluster.


When the deployment of the cluster is completed I get a completed window,
simply click Close.


Now I go back to my terminal window and check what Deploy did.
In the Data Directory of node 49 (the management server) we find the
config.ini file. If I want to edit the MySQL Cluster Configuration file
further I can do that in this file before starting the cluster.

Next in the MySQL Server I have the my.cnf file and a couple of prepared
databases. If I want to edit the MySQL Server configuration further I can
do this in the my.cnf file.

There is no files in the Data Directory of the data nodes. This is created at
initial start of those nodes.


Now when I am done with the preparation I click Deploy and start cluster to
get the cluster started.

This presents me with a progress bar. It starts by starting the management
server. This goes so quickly that it wasn't possible to catch it.

Next it starts the data nodes. This take a bit of time, in my case about 30 seconds.


Next it starts the second data node.


Finally after starting all data nodes it will start the MySQL Server one at a time.


After starting the MySQL Servers the startup is complete. We click Close on the
information popup and then we have a page that also presents the state of each
node in the cluster based on what the management server sees.


Finally we can see the files now created in the management server and the Data
directory of the data nodes.


We now have a cluster with 2 data nodes, 2 MySQL Servers and 1 NDB
management server up and running.

You can access the MySQL Servers on port 3306 and 3307 as any
MySQL Server and start performing any test you want to apply for
your new MySQL Cluster installation.